|
Worry Time could be the most important time of the week for you if you’re a typically anxious person. The idea is that instead of worrying all the time, you set aside a time to worry. This has a hugely positive impact on your life, and if you’re not doing it, you probably should start.
When you set a time to worry, you worry less. Because you limit the amount of worry time in your life, you tend to have less of your time taken up by it, which reduces stress substantially. Worrying at most 20% of the time is healthy. It allows for you to address actual issues, forget about non-issues that can be perceived as issues on the spot, and to give you peace of mind the other 80% of the time. Here’s how it works: your goal is to set to 30 minutes of Worry Time per week. You can start with 30 minutes per day if you have to, with the idea that you’ll slowly transition over to the final goal. You separate your time in two parts: Worry Write, and Worry Do. In Worry Write, you write down everything that worries you, and you give it priorities. I like to color-code (yellow for semi-important and red for very important). Everything you can think of that worries you, you write it down. You look at every point and think “how likely is this to go wrong” “what’s the worst that can happen” and “what can I do to make it better”. Make a plan. Important point here: if you think about something you worry about, tell yourself you’ll write it down during Worry Time. This is to trick your brain into feeling like it’s listened to and valued. If you forget your worry when you get to worry time, you’ll know it’s a sign that you were worrying about something not important at all, and that things got better by themselves- you’re learning to dedramatize. If, however, you can’t get that worry out of your mind after a reasonable amount of time and that it’s affecting your functionality, and you realize that you’ll remove the worry just by writing it down, just go ahead and write it down. You’re allowed to cheat if it’s to help improve your well-being. In Worry Do, this is when you look at your list, revise if all the worries are still valid, and get into action. Whatever plan you had made, you just do it, from the most important to the least important. Put yourself on a timer if it helps, but no matter what you do, stop as soon as your Worry Time is over. Whatever isn’t done, you can put on your Worry Write list and do next time you have time. This seems counter-intuitive, as if leaving a worry on the table and not addressed is a bad thing, but it’s important to note that not only will you have done the most important things first so the others will seem more attainable, but also you’ll realize that even if you don’t address certain things, life goes on. The world will not stop turning just because you can’t do everything on your list of things to do. I used to think I carried the weight of the world on my shoulder. When I started looking at is as a tree full of fruit - where fruits are worries- growing next to me rather than on my back, I saw that I could pick each fruit at my leisure and leave them on the tree with no further consequences. Sometimes, you don’t pick the fruit before it falls out of the tree, but you can certainly learn to make something sweet from them!
1 Comment
Ce qui est drôle à propos des révisions et des corrections, c’est que peu importe combien de fois et avec quelle intensité on le fait, il y en aura toujours qu’on verra pas avant qu'il ne soit trop tard. Mais ça devrait pas empêcher le monde d'essayer de minimiser leur présence dans une bande dessinée ... Faut jamais supposer que juste parce qu’on a terminé une bande dessinée, que c’est prêt à mettre sur le marché. Faut d'abord tester la durabilité et la qualité du produit, alors imaginez qu’on est des scientifiques. On a un produit qu’on doit tester sur des cobayes. On peut pas utiliser un seul cochon d'Inde (et/ou rat de labo) et on doit absolument pas choisir le même type pour chaque sujet. On va également vouloir varier le dosage de ce produit sur différents cochons d'Inde… (et/ou rats de labo). De même, lorsqu’on fait des bandes dessinées, on veut que le livre soit lu par plus d'une personne/cobaye. Idéalement, il y en aura qui auront peu ou pas d'expérience avec des bandes dessinées, des lecteurs de bandes dessinées réguliers, ainsi que des experts en bandes dessinées qui savent tout. On veut également qu'ils se concentrent sur une chose en particulier, soit l'orthographe, la clarté du message, le flow de l'histoire, ou un qui cherche de la saleté. On bénéficie de ceux qui n'ont aucune expérience, car leurs commentaires aident à rendre une histoire plus claire et plus facile à lire. On apprécie ceux qui lisent un peu de BD, parce qu’ils sont en mesure de dire ce qu'ils aiment ou pas, en les comparant à leurs connaissances antérieures. Finalement, on aura probablement une relation amour / haine très intéressante avec les experts de BD, parce qu’ils peuvent détruire une oeuvre de façon très cruelle, mais peuvent également trouver des choses spécifiques à améliorer, et peut-être même donner leur avis sur comment sortir de l’ordinaire. Des BDs sont faites tous les jours, tout autour de la planète. C’est super populaire, suffit d'une minute de recherche sur Internet pour réaliser que c’est vrai. Comment le nôtre peut se démarquer? Ça arrivera probablement jamais. Cependant, c’est possible de lui donner de meilleures chances de survie en s’assurant que le produit est solide sur le plan grammatical et moral, et dans sa composition, avant de le sortir au grand public. En essayant de pousser un peu plus loin, en étant à l’écoute de ses bizarreries, et en voyant les choses sous un nouveau jour (grâce à nos cobayes), on peut commencer à créer un produit unique avec quelque chose qui pourrait très bien capter le cœur des gens et, qui sait, changer l'histoire de la BD pour toujours. À suivre... The funny thing about revisions and corrections is that no matter how much and how thoroughly you do them, there’s always going to be some that you don’t see until it’s too late. But that shouldn’t stop you from trying to minimize their presence in your comic....
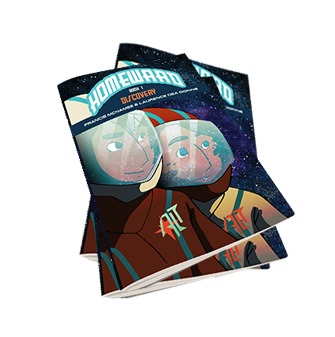
You should never assume that just because you’ve finished a comic, it’s ready to be put out onto the market. You need to test the durability and quality of your product beforehand, so, imagine you’re a scientist. You’ve got a product that you need to test out on guinea pigs. You can’t use only one guinea pig, and you definitely shouldn’t choose the same type of guinea pig for each test subject. You’re also going to want to vary the dosage of this product on different guinea pigs. Similarly, when making comics, you’re going to want to have it read by more than one person. Ideally, there will be some who have little to no experience with comics, some regular comics readers, and some know-it-all comics experts. You’ll want them to focus on one particular thing, either spelling, clarity of message, story flow, or dirt-finder. You’ll benefit from the ones who have no experience because their comments will help you make a clearer and easier story to read an understand. You’ll enjoy the ones who read a bit of comics because they’ll be able to tell you what they liked and didn’t like by comparing them with their previous knowledge, and you’ll likely entertain a very interesting love/hate relationship with those comics experts because as much as they can destroy your baby, they’ll also be able to point out specific things that you can improve on, and maybe even give you input on how to think out-of-the-box. Comics are being made all day every day all around the planet. They’re just that popular, and it only takes a minute of internet research to realize this statement is true. How can yours stand out? It most likely won’t. However, you can give it better chances of survival by ensuring your product is solid grammatically, compositionally, and morally before it reaches people’s hands. By trying to push it just a bit further, by listening to your quirks, and by seeing things from a new perspective (thanks to your guinea pigs), then you can begin to create a unique comic with a special something that could very well capture people’s hearts, and change the history of comics forever. To be continued... Formatting a book is my favorite part of the comics-creation process other than the actual drawing part. This is where it all starts to come together! The cover pages that will wrap up your treasured story, the way each page will flow into the next, all the other important tid-bits like ISBN, legal deposit, credits, etc… When you have all that together, that’s when you know it’s real. The cover is actually a sleeve that holds the inside pages together, and comes in 5 parts, usually referred to as the spine, and cover 1/4 to 4/4. The spine is a tiny bit larger than the signatures all put together, and if you’re lucky enough to have enough pages, can hold a title. I’ve noticed that the French tend to put titles on one side, and the English usually pick the other side. Industry standard or coincidence? I’m not sure… In any case, the front cover is referred to as 1/4, while back cover is called the 4/4, and either of these, though typically on the back cover, is the best place to put an ISBN( International Standard Book Number), which is a code assigned to you by the officials that represents you as a publisher, your book, and the edition of the book. Thus, for the same publisher, the only numbers that will change are those at the very end. Using this number, you can generate a unique barcode, which you can toy with and make into another artsy part of your comic! The inside covers, 2/4 for the front and 3/4 for the back, can be simple patterns, places for story credits or advertisement. They can be color or black & white, independently of the outside cover. The inside of the book is made with either signatures (folded booklets of 8 papers), or all cut flush and glued with archival glue and called “perfect binding”. Using InDesign (another Adobe product) helps to put the inside together and generate a preview for it. You can add text in Photoshop, then import the whole document in InDesign, or import the image directly into InDesign and add all the text from there. You can add page numbers as well, and give your document whatever parameters you want for printing: it’ll set the bleed, margins, and slug for you at whatever dimensions you want. (PS: a slug is the space between the spine and the page, usually gets swallowed up the more there are pages in a book, so it gets bigger and bigger accordingly). To think that all this used to be done by hand… To be continued... Le formatage d'un livre, c’est ma partie préférée du processus de création de BD (à part la partie de dessin). C'est là que tout commence à se placer! Les pages de couverture qui contiennent nos histoires précieuses, la façon dont chaque page découle dans la prochaine, tous les autres éléments importants comme l’ISBN, le dépôt légal, le générique, etc ... Lorsque on a tout ça ensemble, c'est quand on sait que c’est pas juste un rêve.
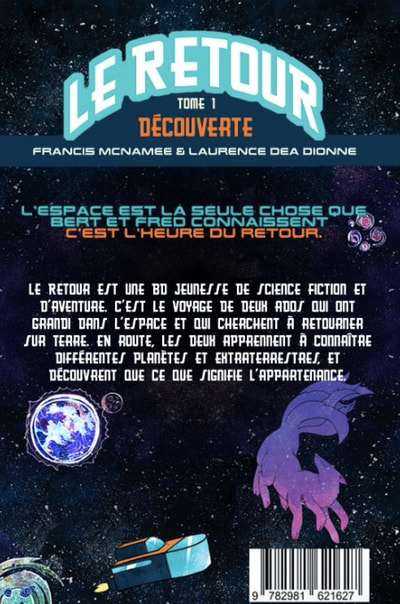
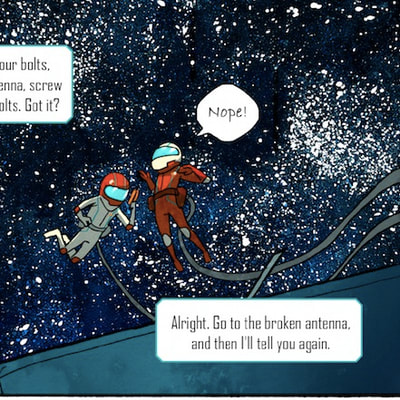
La couverture est en fait une enveloppe qui maintient les pages intérieures ensemble, et vient en 5 parties, dont la première est généralement appelée l’épine, et les autres sont les parties de la couverture, de 1/4 à 4/4. L’épine est un peu plus grande que les signatures toutes réunies, et si on a la chance d'avoir assez de pages, on peut y inscrire un titre. J'ai remarqué que les français ont tendance à pencher le titre sur un côté, et les anglais le font généralement de l'autre côté. Norme de l'industrie ou coïncidence? Je sais pas… Anyway, la couverture avant est appelée 1/4, tandis qu’on appelle la couverture arrière 4/4, et l'une ou l'autre, bien que généralement sur la couverture arrière, est le meilleur endroit pour mettre un ISBN (Numéro international normalisé du livre), qui est un code attribué par les fonctionnaires qui représentent l’éditeur, le livre et l'édition du livre. Ainsi, pour un même éditeur, les seuls chiffres qui changent sont ceux qui sont à la toute fin. En utilisant ce numéro, on peut générer un code à barres unique, qu’on peut transformer en une autre oeuvre d’art sur la BD! Les couvertures intérieures, 2/4 pour l'avant et 3/4 pour le dos, peuvent être des motifs simples, un endroit pour le générique, ou de la publicité. Ils peuvent être en couleur ou en noir et blanc, indépendamment de la couverture extérieure. L'intérieur du livre est fait avec soit des signatures (livrets pliés de 8 papiers), soit tous coupés et collés avec de la colle d'archivage et appelés "reliure allemande". L'utilisation d'InDesign (un autre produit Adobe) permet de rassembler l'intérieur et d'en générer un aperçu. On peut ajouter du texte dans Photoshop, puis importer le document entier dans InDesign, ou importer les images directement dans InDesign et y ajouter tout le texte. On peut également ajouter des numéros de page, et donner au document les paramètres qu’on souhaite imprimer: le programme prend en compte les fonds perdus, les marges et le “slug”, et sont ajustables. (PS: le “slug”, c’est l'espace entre l’épine et la page, englouti au fur et à mesure qu'on ajoute des pages dans un livre, donc ça devient de plus en plus grand en conséquence). C’est fou de penser que tout ça était fait à la main y’a pas si longtemps... A suivre ... Lettering is an important part of a comic in that it helps complete the information in a story that the images alone might not be able to do by themselves. This falls into 3 categories: dialogue, onomatopoeia, and narration. Dialogue is a conversation. Words spoken, screamed, or whispered, by characters (animate or inanimate). Sometimes it doesn’t even have to be words: symbols can work just as well to replace them. If you’re bad at spelling, then I recommend this option to the traditional text-in-bubble stuff. Generally, the older your intended audience is, the more words you can use, the more complicated they can get, and the more abstract as well. Writers for kids tend to use a lot of repetition: characters saying what they are doing as they are doing it. Adult comics, on the other hand, can go on non-sequitur tangents for days, talking about some dream or philosophy while the pictures describe someone casually having tea and biscuits, for example. It can make for very interesting metaphors. An onomatopoeia is a word for a sound. Splash, bam, tick, woosh, etc. Sometimes they’re common knowledge, and sometimes you just need to make some up. It can be really interesting to work in a comic studio and ask everyone how they would spell the sound of someone trudging through knee-high mud. In cases like these, there’s often no right answer to the spelling, but there is one important thing to keep in mind: the words must be an integral part of the image. Whatever sound they represent, the letters have to look like the thing they are. Play with color symbolism, line and shape, and make it as messy or clear-cut as the situation asks for. Narration is a type of dialogue, but serves to introduce concepts, speaking directly to the reader, pulling them into the story, or breaking the fourth wall to force them to reflect on their own situations. A comics master will know how to play with all three of these elements in order to create a unique and enthralling journey, using language relatable to the audience. The placement of these can help to create a visual language that enhances the illustrations themselves, all while keeping a magical-like flow to the experience. One thing that, sadly, can take a reader out of the story abruptly is choice of font. Firstly, a comic artist should always be concerned with legibility: if your m’s look like h’s and your d’s look like ol’s, then the reader will have to put in conscious effort to keep up, and many will give up before they realize your story is worth pursuing. Secondly, the lettering itself should reflect the mood and character of the comic, much like the onomatopoeia should be a part of the images themselves. Finally, it’s important to know where those fonts come from because most are free to use personally, but many need a commercial license to be printed or used on the web. For this reason, you can either find someone who makes them and commission them, or buy licenses, which run anywhere from 30$ to 300$ for variations and how widely distributed it will be. Never assume you’re safe from the law- you never know what crazies are out there… that’s why I now keep electric tape on my webcam… Last note: to make bubbles in Photoshop (you can also do it in InDesign), just select the text area, expand and smooth the selection by however many pixels you think looks good, then fill on another layer (between the text and the image) and select the stroke option in the layers menu. You can add a tail to the bubble by using the lasso tool and filling in that space as well on the same layer as the bubble. Change the color and width of the stroke as desired, and voilà! To be continued... Le lettrage est une partie importante d'une bande dessinée, servant à compléter l'information contenue dans une histoire, que les images seules ne pourraient pas faire par elles-mêmes. On parle de: dialogue, onomatopée, et narration.
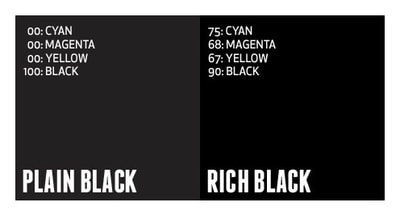
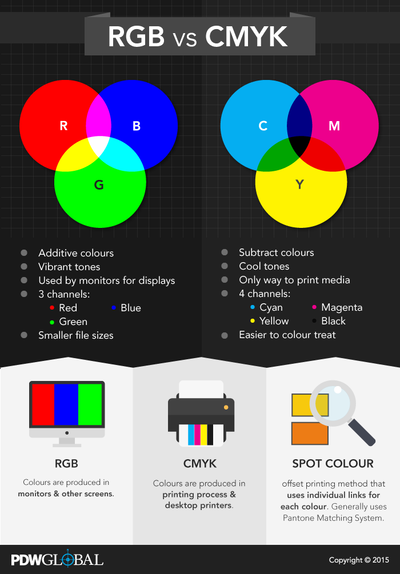
Le dialogue est une conversation. Des mots prononcés, criés ou chuchotés par des personnages (animés ou inanimés). C’est même pas obligé d’être des mots: les symboles peuvent aussi bien les remplacer. Si on est pas bon en grammaire, alors je recommande cette option pour le texte en bulles. Généralement, plus notre public cible est âgé, plus on peut utiliser de mots, plus ils peuvent être compliqués et plus ils peuvent être abstraits. Les écrivains pour enfants ont tendance à utiliser beaucoup de répétitions: les personnages disent ce qu'ils font pendant qu'ils le font. D'un autre côté, les BDs pour adultes peuvent faire des tangentes non séquentielles, parler d'un rêve ou d'une philosophie tandis que les images montrent quelqu'un qui boit du thé un samedi matin, par exemple. Ça peut faire des métaphores très intéressantes. Une onomatopée est un mot pour un son. Splash, bam, tic, boum, etc. Parfois, ils sont populaires, et parfois on a besoin d'en inventer. Ça peut être très intéressant de travailler dans un studio de BD et de demander à tout le monde comment ils écriraient le son de quelqu'un qui traîne dans de la bouette jusqu'aux genoux. Dans des cas comme ça, y’a souvent pas de bonne réponse quand à l'orthographe, mais y’a une chose importante à garder en tête: les mots doivent faire partie intégrante de l'image. Aussi, quel que soit le son qu'elles représentent, les lettres devraient ressembler à ce qu'elles représentent. Faut jouer avec le symbolisme de la couleur, la ligne et la forme, et les faire désordonné ou propre, selon la situation. La narration est un type de dialogue, mais sert à introduire des concepts, à parler directement au lecteur, à les insérer dans l'histoire ou à briser le quatrième mur pour les forcer à réfléchir sur leur propre situation. Un maître de la BD saura jouer avec ces trois éléments afin de créer un voyage unique et passionnant, en utilisant un langage accessible au public. Le placement de ceux-ci peut aider à créer un langage visuel qui améliore les illustrations eux-mêmes, tout en ajoutant un flow presque magique à l'expérience. Une chose qui, malheureusement, peut sortir un lecteur brusquement hors de l'histoire est le choix de la police. Tout d'abord, un dessinateur doit toujours se soucier de la lisibilité: si un m ressemble à un h et que les d ressemblent à ol, alors le lecteur devra faire un effort conscient pour suivre, et aura plus de chances d’abandonner avant de réaliser que l’histoire vaut la peine de continuer. Deuxièmement, le lettrage lui-même devrait refléter l'humeur et le caractère de la bande dessinée, tout comme l'onomatopée devrait faire partie des images elles-mêmes. Enfin, c’est important de savoir d'où viennent ces polices car la plupart sont gratos pour toute utilisation personnelle, mais beaucoup ont besoin d'une licence commerciale pour être imprimées ou utilisées sur le web. Pour cette raison, on peut soit trouver quelqu'un qui les fabrique et les commander, ou sinon acheter des licences, qui vont de 30 $ à 300 $ pour les variations et la distribution à grande échelle. Faut jamais assumer qu’on est à l'abri de la loi - on sait jamais où se cachent les fous ... Voilà pourquoi je garde maintenant un morceau de tape électrique sur ma webcam ... Dernière remarque: pour faire des bulles dans Photoshop (on peut aussi le faire dans InDesign), suffit de sélectionner la zone de texte, d'agrandir et de lisser la sélection par autant de pixels que désiré, puis de remplir sur un autre calque (entre le texte et l'image ) et sélectionner l'option de tracé dans le menu de la calque.On peut ajouter une queue à la bulle en utilisant le lasso et en remplissant cet espace sur le même calque que la bulle. Et finalement, changer la couleur et la largeur de la course comme on le veut! À suivre... Coloring is the most beautiful thing that can happen to a comic. It saves the ugly and helps flourish the already pretty. Basic coloring is basically flatting, but it takes a good eye and a serious sit-down-and-think to make it into something remarkable. But anyone can do it. Especially those who have Photoshop. Those who color their comics with watercolor, gouache, or inks, are my heroes. In this technology-ridden world, too many people rely on the UNDO command and the fear for mistakes that you can’t fix in the traditional mediums becomes an overwhelming apocalyptical kind of feeling. In truth, traditional mediums will always have rough time because though they may be beautiful in reality, they are nearly impossible to give justice to when it comes to scanning and mass reproduction. If you’re looking for an original work of art, you can be sure that the real thing will always be better, but it’s neither cheap nor time-saving to make a full comic in this manner. Digital coloring will always win (this is my opinion) because it will always be easier to fix mistakes, and it will have the capacity for consistency in print. Tips for coloring include doing a lot of studies, building a base of references, making color themes and organizing them by swatches, adding a little bit of texture to large flat spaces, and, most importantly, paying attention to lighting. Light tends to have a warm tone to it, so when adding a light layer, make sure to add yellow, red or orange to the base color. Shadow is similar in that there’s no such thing as a natural black; it’ll always be a mix of dark blues, purples, greens and browns. You never want to use black unless you’re trying to make a statement, and if you intend to print it, please use the right type of black so that it stays rich instead of flattening and killing the mood. Don’t be afraid to veer from the logical into the crazy colors. Mood plays a huge role in how we react to comics and it’s decided mostly through color. You can put a lavender or payne’s grey wash over an image to make it more bleak, or more tense with yellow or chartreuse, or more friendly and cozy with a soft pink or a rich, fluffy green. Finally, if you’re printing your comic, make sure all your colors come from the CMYK spectrum. Computer colors are light-based, and the addition of different quantities of R(red), G(green) and B(blue) will create specific colors, until all of each of them together gives pure white light. When printed, RGB colors will look entirely different than on your computer screen, but ink doesn’t work the same way. It instead starts with a white background (your sheets of paper) and adds a mix of C(cyan), M(magenta), Y(yellow) and K(for black). If you start off with the computer mimicking those colors, then you’ll be more likely to be satisfied with the printed result! One more thing: Different papers absorb ink differently, and different printers print differently. Colors tend to look darker when printed than on a computer screen, so getting proofs of your comic before mass printing is a great idea. Your eyes will get more sensitive to these differences as you experiment. Hopefully, thanks to this blog post, next time an artist is disappointed by a printed thing that looks just fine to you, you’ll be better able to put yourself in their shoes! To be continued... La couleur est la plus belle chose qui puisse arriver à une bande dessinée. Ça sauve ce qui est laid et aide à faire fleurir le déjà beau. La couleur, à la base, est simplement des aplats, mais il faut un bon œil et un peu de sérieux pour réussir à en faire quelque chose de remarquable. Mais n'importe qui peut le faire... Surtout ceux qui ont Photoshop!
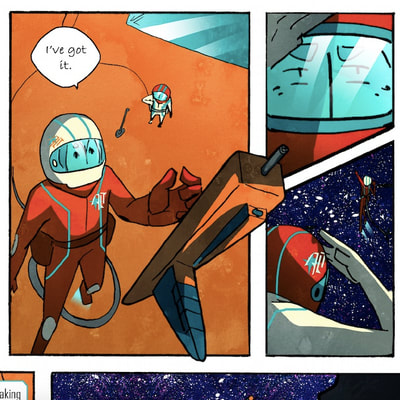
Ceux qui colorient leurs bandes dessinées à l'aquarelle, à la gouache ou à l'encre sont mes héros. Dans un monde dominé par la technologie, trop de gens dépendent de la commande UNDO et la peur des erreurs impossible à résoudre qui est caractéristique des médiums traditionnels devient un sentiment apocalyptique accablant. Pour dire vrai, les médiums traditionnels auront toujours de la difficulté parce que, même s'ils peuvent être beaux dans la réalité, c’est presque impossibles à leur rendre justice quand on est rendu à numériser et reproduire en masse. Ceux à la recherche d'une œuvre d'art originale peuvent être sûr que la vraie chose sera toujours meilleure, mais c'est ni bon marché ni efficace pour faire une bande dessinée complète de même. La coloration numérique en sortira toujours gagnante (c'est mon opinion) parce que ça sera toujours plus facile de corriger les erreurs, et ça garantit une certaine consistance quant à l'impression. Quelques conseils pour la coloration: faire beaucoup d'études, construire une base de références, faire des échantillons de couleur et les organiser par thème, en ajoutant un peu de texture à de grands espaces plats, et, surtout, prêter attention à l'éclairage:. La lumière a tendance à avoir un ton chaud, donc quand on ajoute une couche légère, faut s’assurer d'ajouter du jaune, du rouge ou de l'orange à la couleur de base. L'ombre est similaire dans le sens que le noir naturel existe pas; ce sera toujours un mélange de bleus foncés, de violets, de verts et de bruns. Faut jamais utiliser le noir, sauf si on essaye de faire un statement, et si on a l'intention de l'imprimer plus tard, faut absolument utiliser le bon type de noir afin qu'il reste riche au lieu d'aplatir et de ruiner l’atmosphère. Faut pas avoir peur d’ignorer la logique des fois. L’atmosphère joue un rôle super important dans la façon dont on réagit aux bandes dessinées et c'est principalement à travers la couleur que ça arrive. On peut mettre un peu de lavande ou de lavis gris sur une image pour la rendre plus sombre, ou la rendre plus tendue avec du jaune ou un peu de chartreuse, ou plus amicale et confortable avec un rose doux ou un vert riche et moelleux. Enfin, si on imprime notre bande dessinée, faut s’assurer que toutes les couleurs proviennent du spectre CMJN (CMYK en anglais). Les couleurs de l'ordinateur sont crées grâce à la lumière: l'addition de différentes quantités de R (rouge), G (vert) et B (bleu) crée des couleurs spécifiques, jusqu'à ce que chacune d'entre elles ensemble donne une lumière blanche pure. Une fois imprimées, les couleurs RVB ont une apparence complètement différente de celle de l'écran d’ordinateur, mais l'encre ne fonctionne pas de la même façon. Au lieu, ça commence avec un fond blanc (la feuille de papier) et ça ajoute un mélange de C (cyan), M (magenta), J (jaune) et N (pour le noir). Si on commence avec l'ordinateur qui imite ces couleurs, alors on risque d'être beaucoup plus satisfait du résultat imprimé! Une dernière chose: différents papiers absorbent l'encre différemment et différentes imprimantes impriment différemment. Les couleurs ont tendance à paraître plus foncées quand elles sont imprimées que sur un écran d'ordinateur, alors ça aide beaucoup d’avoir des épreuves avant l'impression. On devient de plus en plus sensibles à ces différences lorsque on expérimente- c’est un truc qui se développe avec le temps... Heureusement, grâce à ce blog post, la prochaine fois qu'un artiste est déçu par une chose imprimée qui a l’air ben correct, vous serez mieux en mesure de vous mettre à leur place! À suivre… |



 RSS Feed


